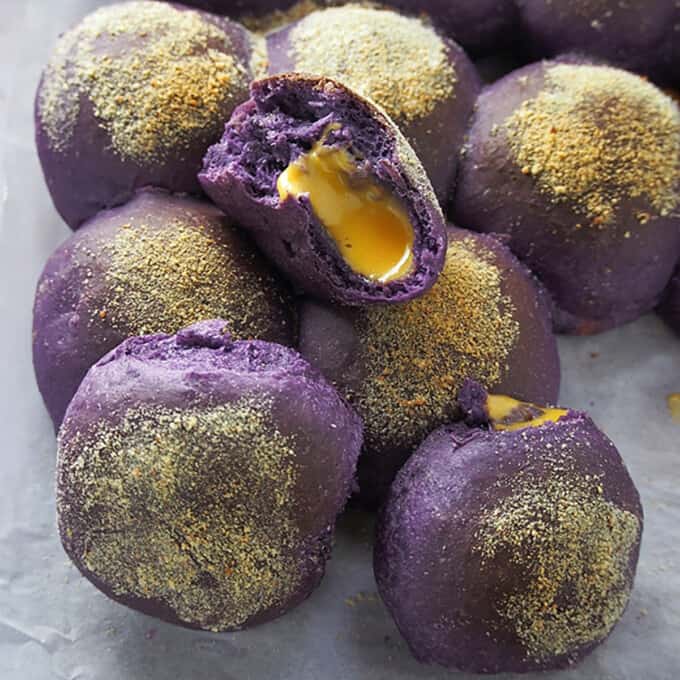
Ube Cheese Pandesal are a new twist on our classic Filipino dinner roll. Ultra-soft and delicious with an intense purple-yam flavor and melty cheese filling, they're great for breakfast or anytime snack.

Hello guys! I'm Sanna, and I am back here at Kawaling Pinoy to bring you a delicious twist on our iconic Filipino bread roll. It's so much fun to see different sorts of baked goods on social media, and the hottest pick of them all are ube cheese pandesal rolls!
If you love pandesal, you'll love this purple yam version. Super soft and fluffy with an intense purple yam flavor and savory cheese filling, every bite is bread heaven.
How to make ube cheese pandesal
Everyone wants to make them, and because you guys asked, here's a step-by-step guide. The recipe is based on my tried and tested sweet potato dinner rolls, which are always a hit. I replaced the mashed kamote with ube, rolled the dough in bread crumbs before baking, and voila! Best ube pandesal ever!
Step 1: prepare purple yam
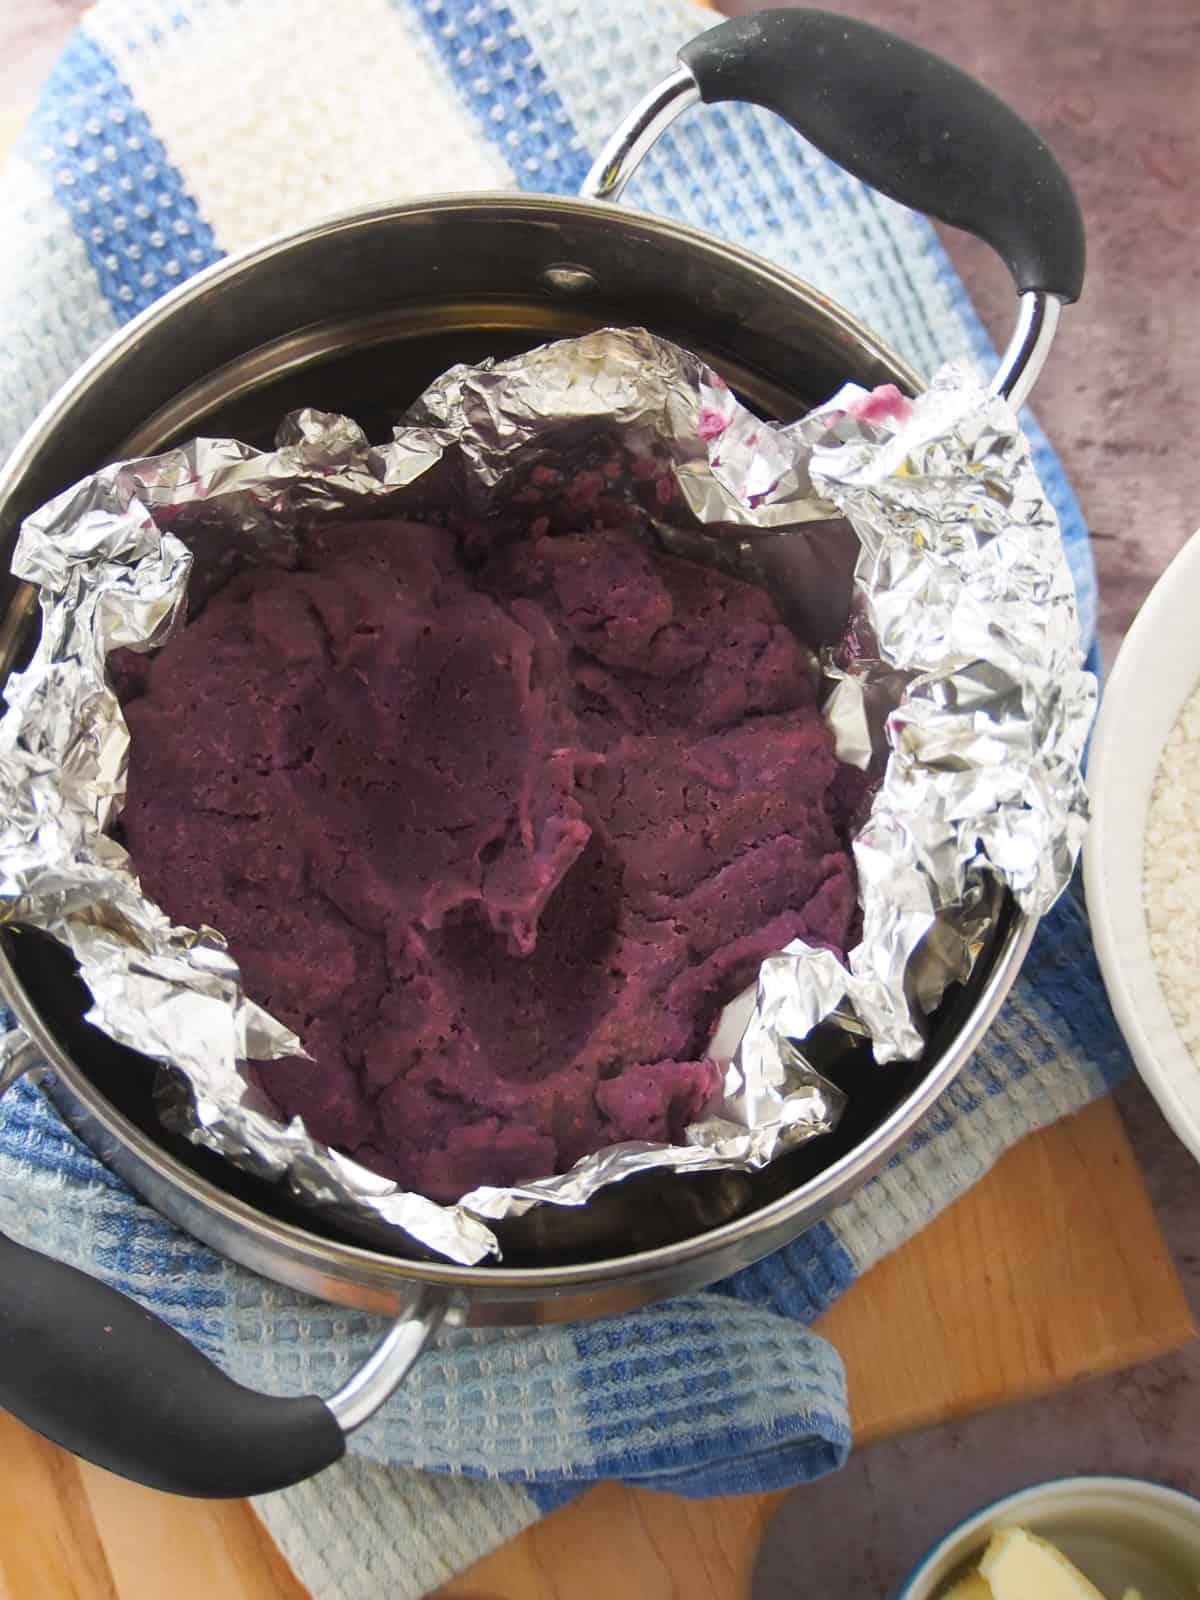
- If using frozen grated ube, thaw completely and remove from package. Wrap the thawed ube in aluminum foil, leaving a little opening on top, and place in a steamer basket. Steam for about 10 to 15 minutes or until soft. Allow to cool slightly and mash until smooth, if needed. Use ½ cup.
- If using fresh ube, place one medium purple yam and enough water to cover in a saucepan and cook over medium heat until fork-tender. Drain and allow to cool to touch. Peel the yam and mash with a fork or potato masher until smooth. Use ½ cup.
- If using prepared ube halaya, use ½ cup jam and decrease sugar to 4 tablespoons.
- If using ube powder, reconstitute ¼ cup of the powder with ¾ cup hot water and stir until smooth.
Step 2: make the dough
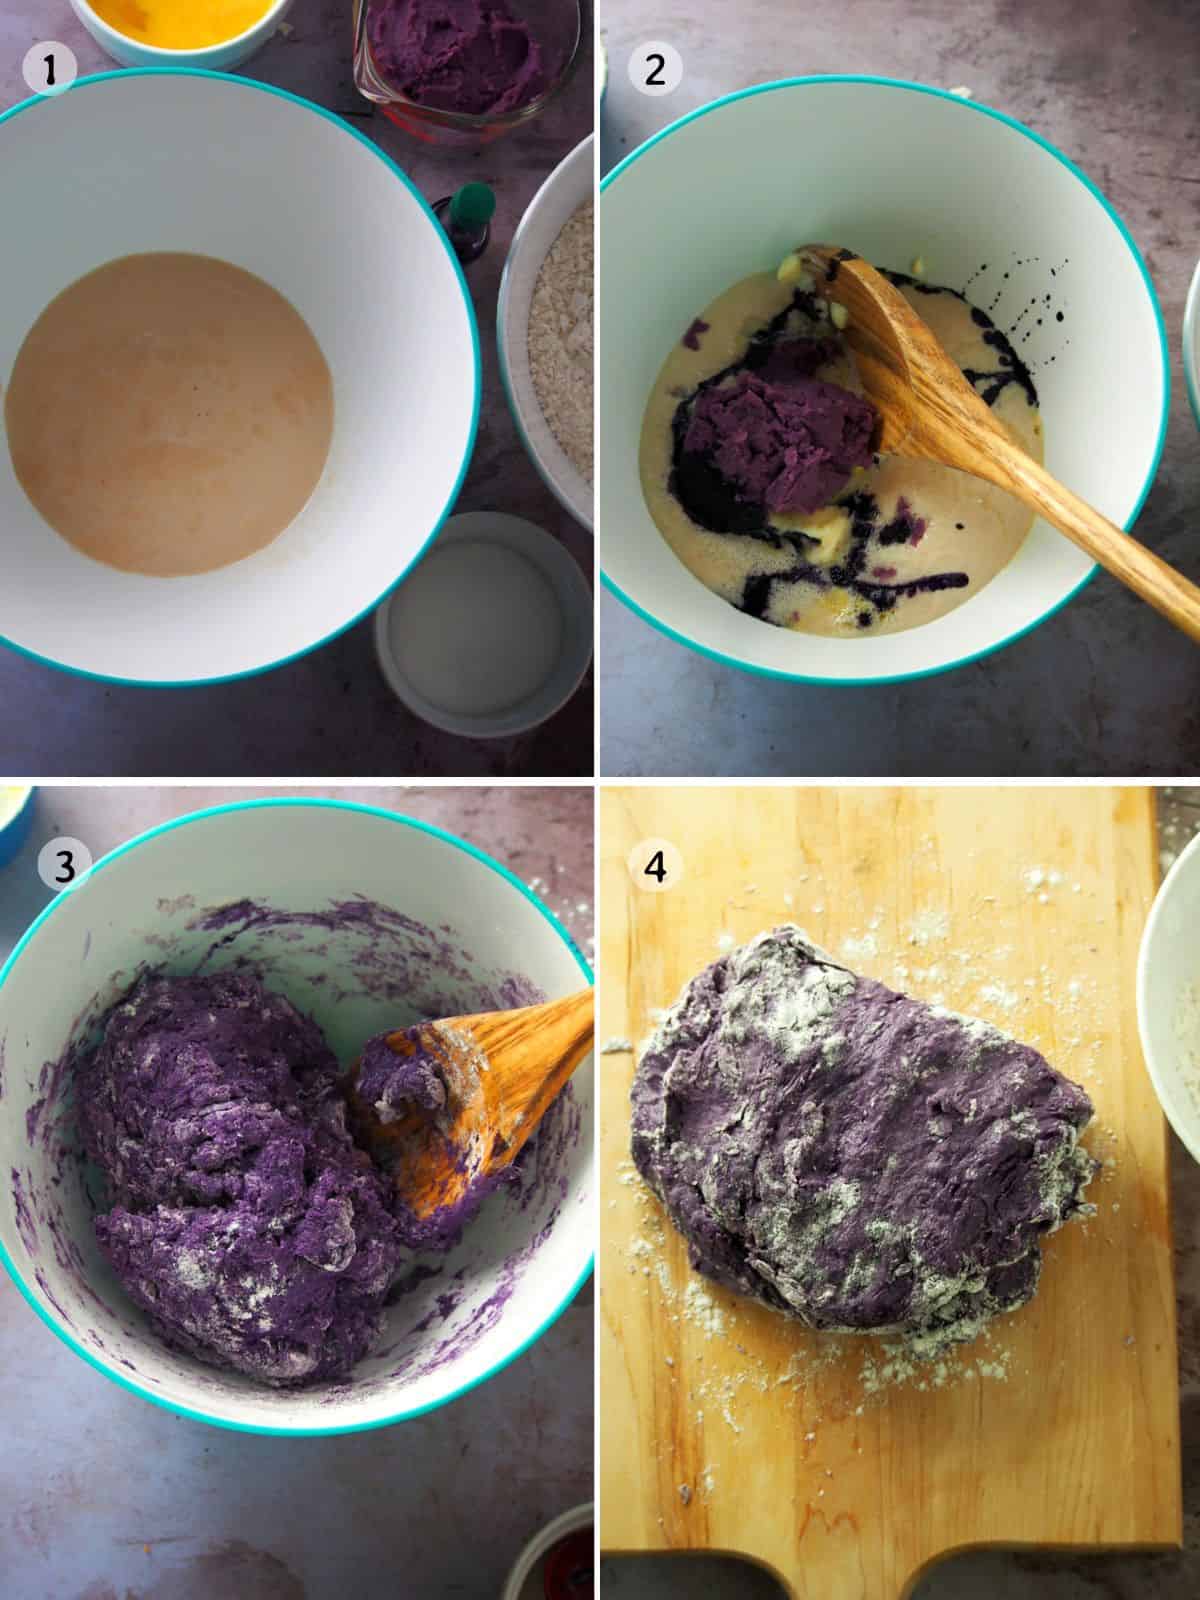
- Proof the yeast in a mixing bowl. Add the warm water (105 to 115 F temperature) and sprinkle the active dry yeast and one tablespoon of sugar. Stir the mixture and let stand for about 5 minutes or until foamy.
- Add the softened butter, the eggs, the remaining sugar, warm milk, the mashed purple yam, and salt. Stir the ingredients until well combined with a wooden spoon.
- Add flour, one cup at a time, stirring well each addition. By this time, the dough is starting to form a shaggy mass. Add just enough of the remaining flour to manage stickiness and stir until the dough comes together in the center of the bowl.
- Lightly flour a kneading board and turn the sticky dough. Use oil and a little flour to make kneading easier while keeping the bread texture soft. Grease the work surface and your hands as needed and sprinkle the dough with flour, but do so sparingly, as oversaturating the dough with oil will keep it from rising, and adding too much flour will dry it.
Step 3: knead, proof, and assemble
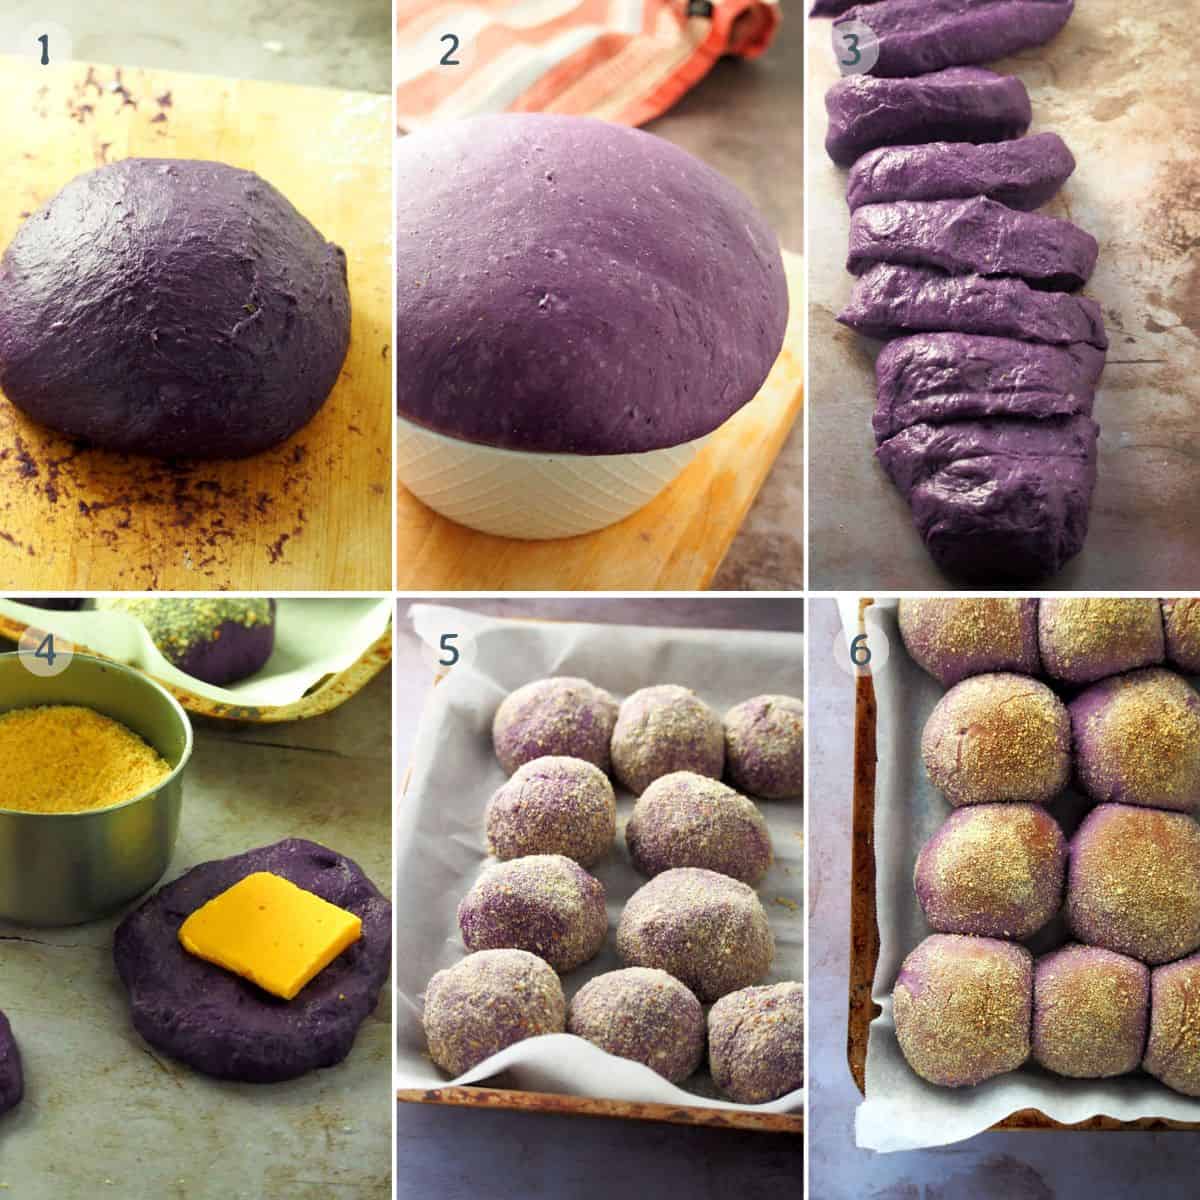
- As you knead, the dough will gradually lose its stickiness, but it will remain somewhat tacky. To check if the dough is well-kneaded, do the windowpane test. Take a small portion of the dough and stretch it out with your fingers to form a square. A translucent film should form in the center without breaking easily. The dough should be smooth and elastic.
- Place the kneaded dough in a lightly oiled bowl and cover with a kitchen towel. Let rise until it doubles in size.
- Gently deflate the risen dough, form it into a log, and cut it vertically. Cut each half into smaller portions.
- Using the palm of your hands, flatten each dough portion and place a piece of cheese in the center. Fold the dough around the cheese and form it into a smooth ball, tucking the ends under to seal.
- Roll the dough in bread crumbs and arrange in a single layer on a parchment-lined baking sheet. Cover loosely with a clean kitchen towel and let rise until puffy and has doubled in size.
- Bake in a preheated oven until slightly browned. Remove from the oven and allow to cool slightly, as the filling will be hot!
Baking tips
- Check the temperature of the water used for proofing the yeast to ensure it’s within 105-115 F range as very hot liquids can kill the yeast. If the mixture doesn't foam in about 5 to 10 minutes, do not use and discard.
- The dough will gradually lose its stickiness as you knead, but it will remain somewhat tacky.
- Cut the cheese into squares instead of cubes so you get more cheesy areas inside the buns.
Frequently Asked Questions
How do you use ube powder?
If fresh or frozen purple yams are unavailable, you can use ube powder. Reconstitute ¼ cup of the powder with ¾ cup of hot water, stir until smooth and use in the recipe as directed.
How to serve and store
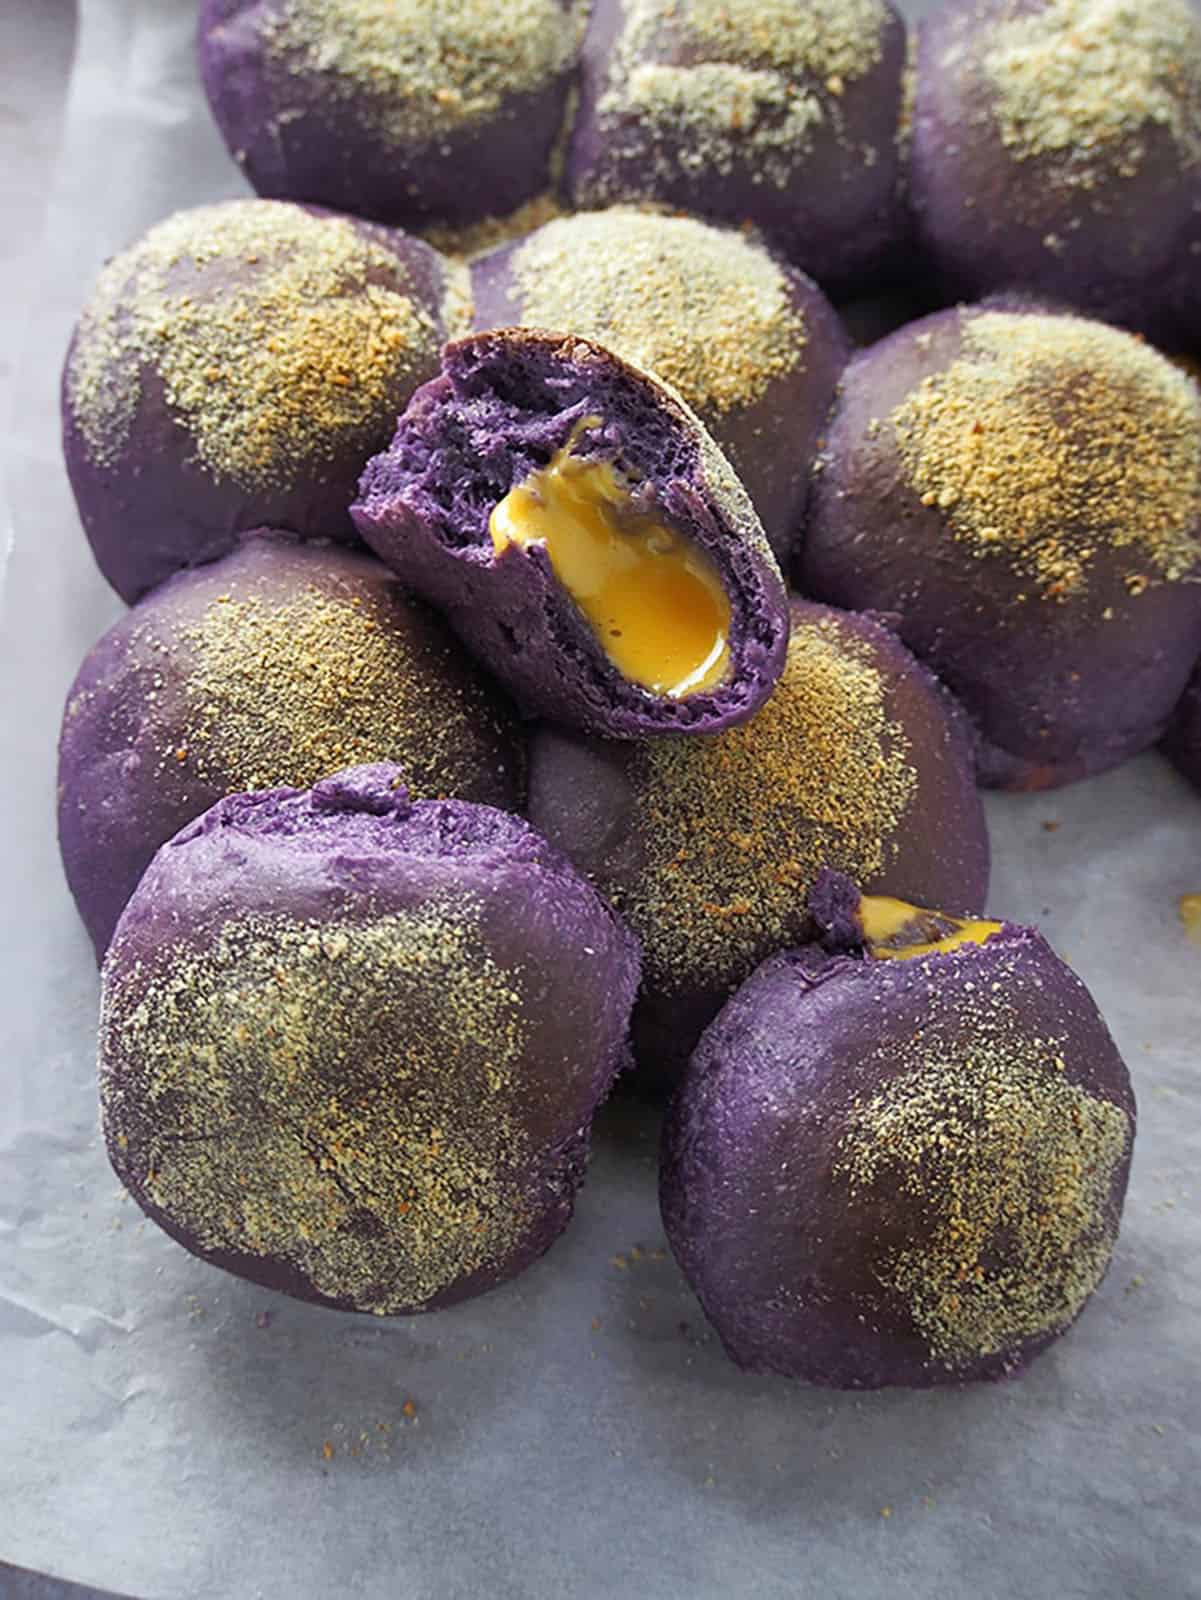
- Serve as a breakfast or midday snack with coffee, tea, or your favorite beverage. They're best enjoyed freshly baked, but again, be careful, as the melted cheese filling can be very hot.
- Ube pandesal with cheese stays soft for days after baking. Leftovers can be stored in a tightly covered container at room temperature for up to two days or in the refrigerator for up to one week.
- To reheat in the oven, arrange the rolls in a baking dish and bake in a 350 F oven for 5 to 7 minutes until warm. To reheat in the microwave, arrange the rolls on a microwavable plate and cover with a slightly damp kitchen towel. Microwave for 30 to 40 seconds until warm and not piping hot, lest they turn tough and chewy.
Ingredients
- ¼ cup warm water
- 1 packet (2 ¼ teaspoons) active dry yeast
- 6 tablespoons white granulated sugar
- 3 tablespoons butter, softened
- 2 eggs, lightly beaten
- ¼ cup warm milk
- ½ cup mashed cooked ube
- 1 ½ tablespoons liquid ube flavoring
- 1 teaspoon salt
- 3 ½ cups flour
- 1 tablespoon vegetable oil, for kneading
- ½ pound Velvetta cheese (or any quick melat cheese), cut into 14 two-inch and ¼-inch thick squares
- ½ cup bread crumbs
Equipment
- baking sheets
Instructions
- In a mixing bowl, add the warm water (105 to 110 F in temperature) and sprinkle the active dry yeast and 1 tablespoon of the sugar. Stir the mixture and let stand for about 5 minutes, or until foamy.
- Add the softened butter, eggs, the remaining sugar, warm milk, mashed purple yam, ube flavoring, and salt. With a wooden spoon, stir the ingredients until well combined.
- Add 3 cups of the flour, one cup at a time, stirring well after each addition until the dough forms a shaggy mass. Add just enough of the remaining flour (you might not use the whole ½ cup) to manage stickiness and stir until the dough comes together in the center of the bowl.
- Lightly grease a kneading board with the oil, and turn the dough out.
- Lightly grease hands with oil and knead the dough, pushing the dough down and away from your body using the heels of your palms, until it's smooth and elastic but still somewhat tacky.
- Place the kneaded dough in a lightly oiled bowl and cover with a kitchen towel. Let rise for about 1 ½ to 2 hours or until double in size.
- Gently deflate the risen dough and form it into a 20 to 22-inch log. Cut the log vertically in half and then cut each half into 7 smaller portions to yield 14 portions.
- Using the palm of hands, flatten each dough portion and place a piece of cheese in the center. Fold the dough around the cheese and form it into a smooth ball, tucking the ends under to seal.
- Roll the dough in bread crumbs and arrange in a single layer at about ½ inch apart on a parchment-lined baking sheet.
- Cover loosely with a clean kitchen towel and let rise for about 30 to 60 minutes or until puffy and doubled in size.
- Preheat oven to 350 F.
- Bake for about 20-23 minutes. Remove from the oven and allow to slightly cool as the filling will be hot!
Notes
- Check the temperature of the water used for proofing the yeast to ensure it’s within 105-115 F range as very hot liquids can kill the yeast.
- The dough will be sticky. To make kneading easier while keeping the bread texture soft, use oil and about 1 teaspoon flour. Grease work surface and your hands as needed but do so sparingly as oversaturating the dough with oil will keep it from rising and too much flour will make it dry.
- The dough will gradually lose its stickiness as you knead, but it will remain somewhat tacky.
- To check if the dough is well-kneaded, do the windowpane test. Take a small portion of the dough and with your fingers, stretch it out to form a square. A translucent film should form in the center without breaking easily.
- Cut the cheese into squares instead of cubes so you get more cheesy areas inside the buns.
Video

Nutrition Information
“This website provides approximate nutrition information for convenience and as a courtesy only. Nutrition data is gathered primarily from the USDA Food Composition Database, whenever available, or otherwise other online calculators.”


Emma Guevarra says
Your recipes are always great and yummy easy to follow.
Love your site.
Congratulations!
GRACE TAN LEE says
I bought ube powder. The consistency of the ube powder and water is watery. Should I still follow your recipe or the flour or liquid should be adjusted since the ube is not the same consistency with mashed ube nor ube halaya.
Lionel says
Awesome